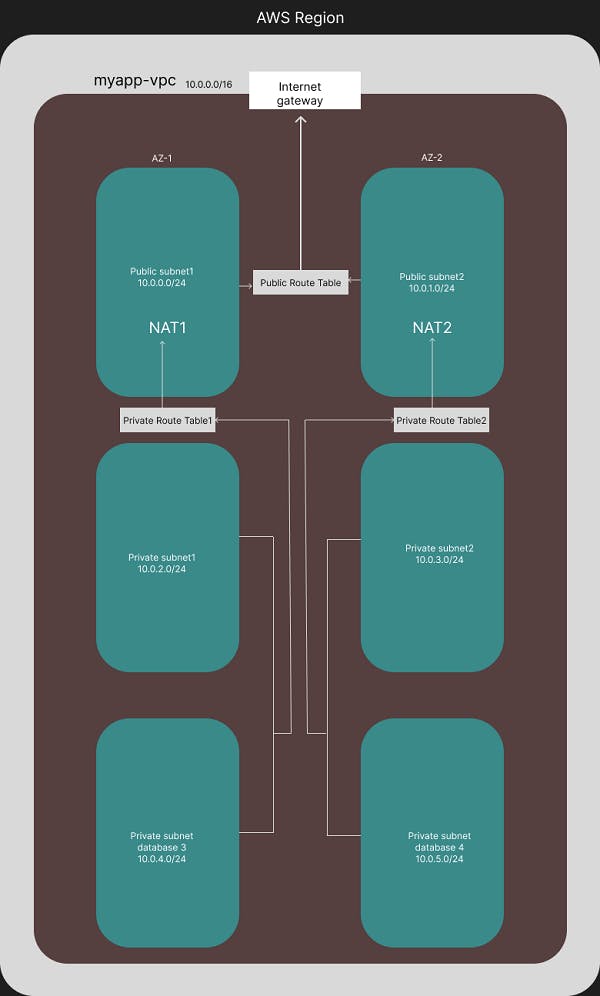
Below is the 3-tier architecture that is going to be implemented in AWS.
VPC

Search for VPC in aws search bar and open the first resource.
Click on Create VPC.

Give nametag and CIDR range.
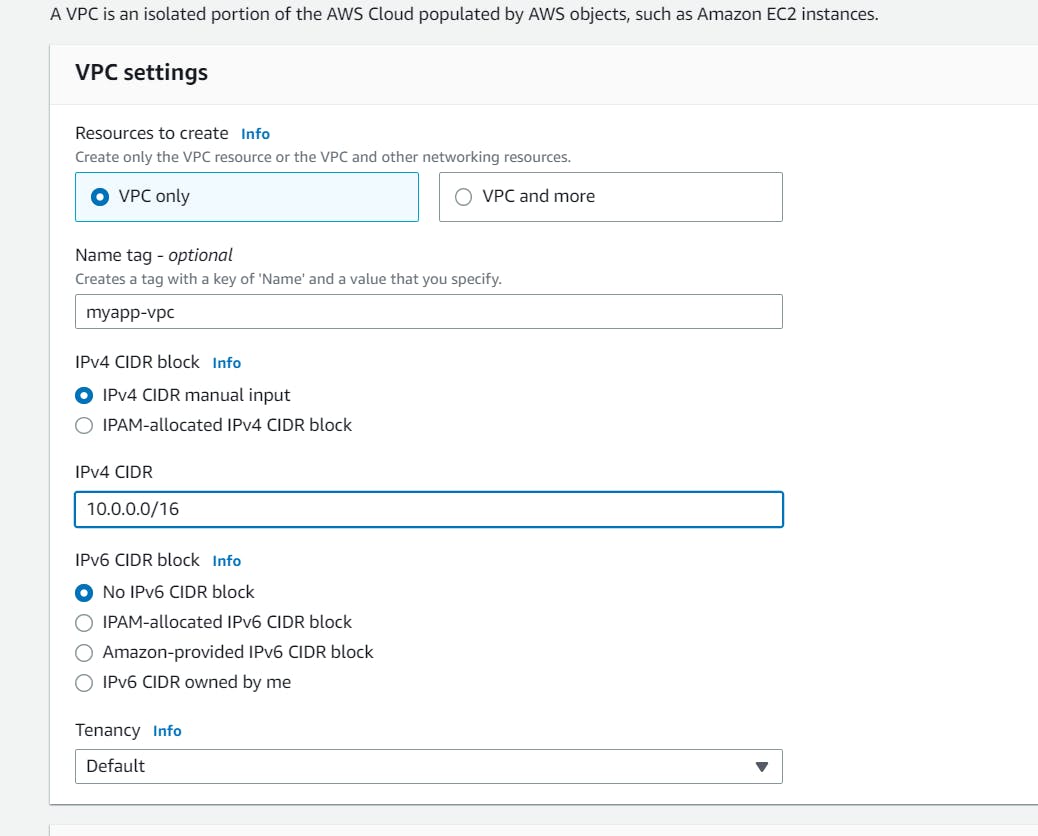
- Click on create vpc and it will be displayed.

Subnets
Click on the subnet just below Create VPC section in the sidebar.
Filter it with VPC.

Click on Create Subnet located at the top right corner of the Subnets page.
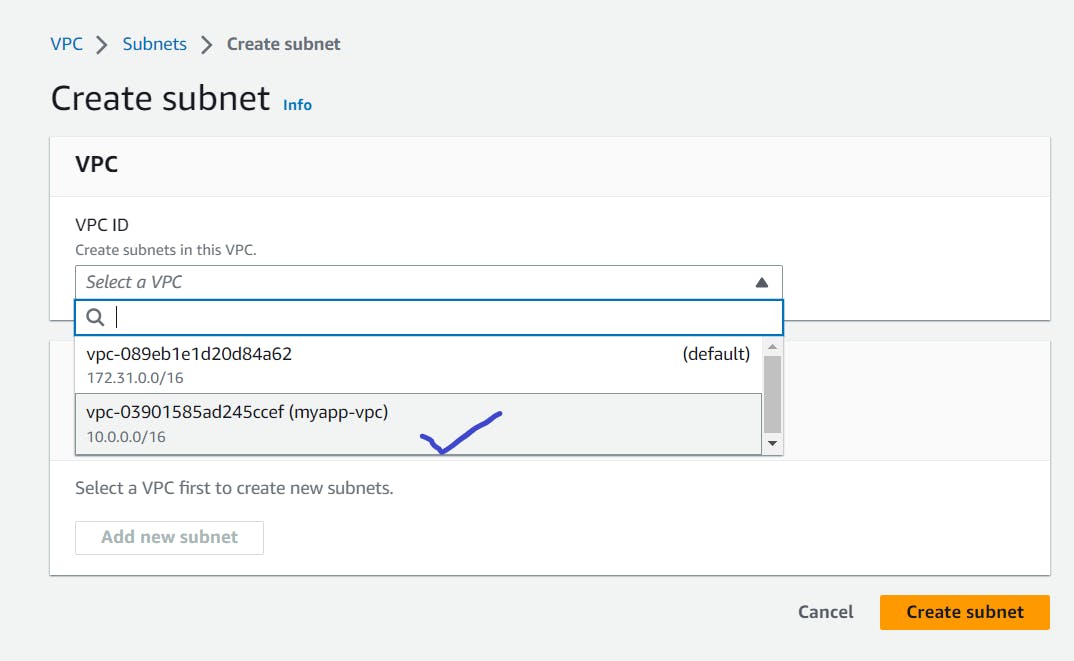
Provide VPC.
Provide Subnet name, Availability zone (as per architecture), CIDR block(As per architecture
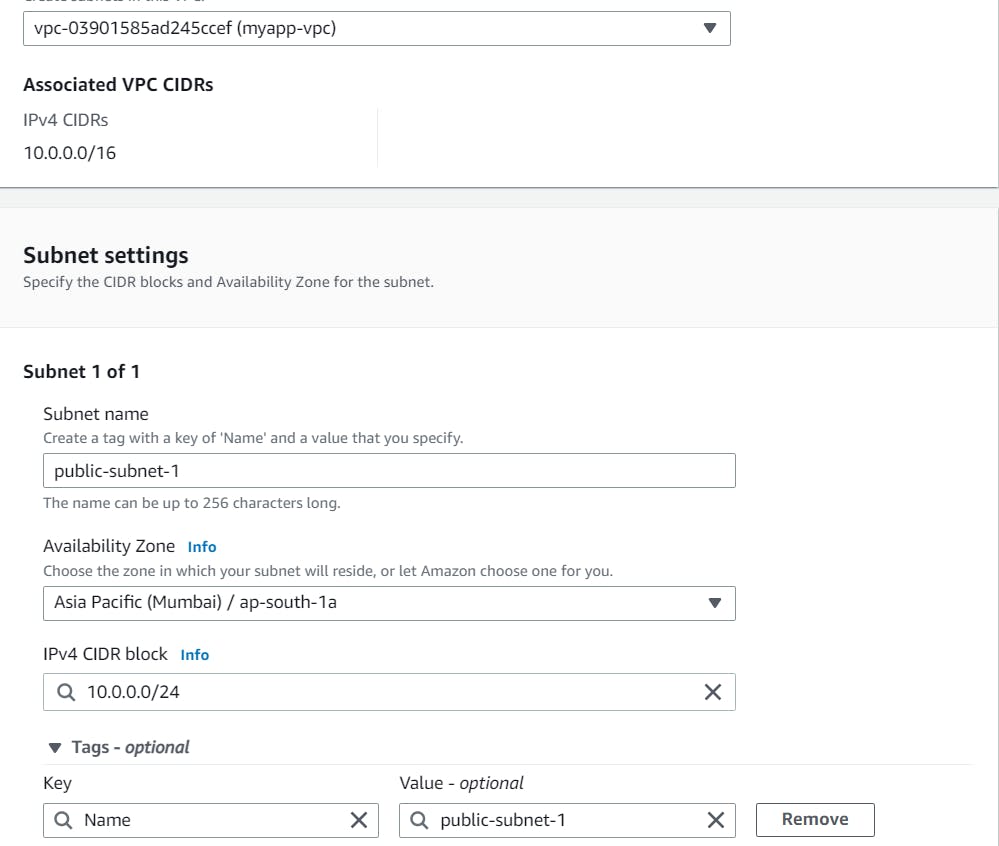
Check properly the availability zone and cidr block.

Create two public subnets and 4 private subnets as per the architecture diagram.

Route Tables
From the sidebar, search for route tables and click on Create route table.

Provide the VPC.
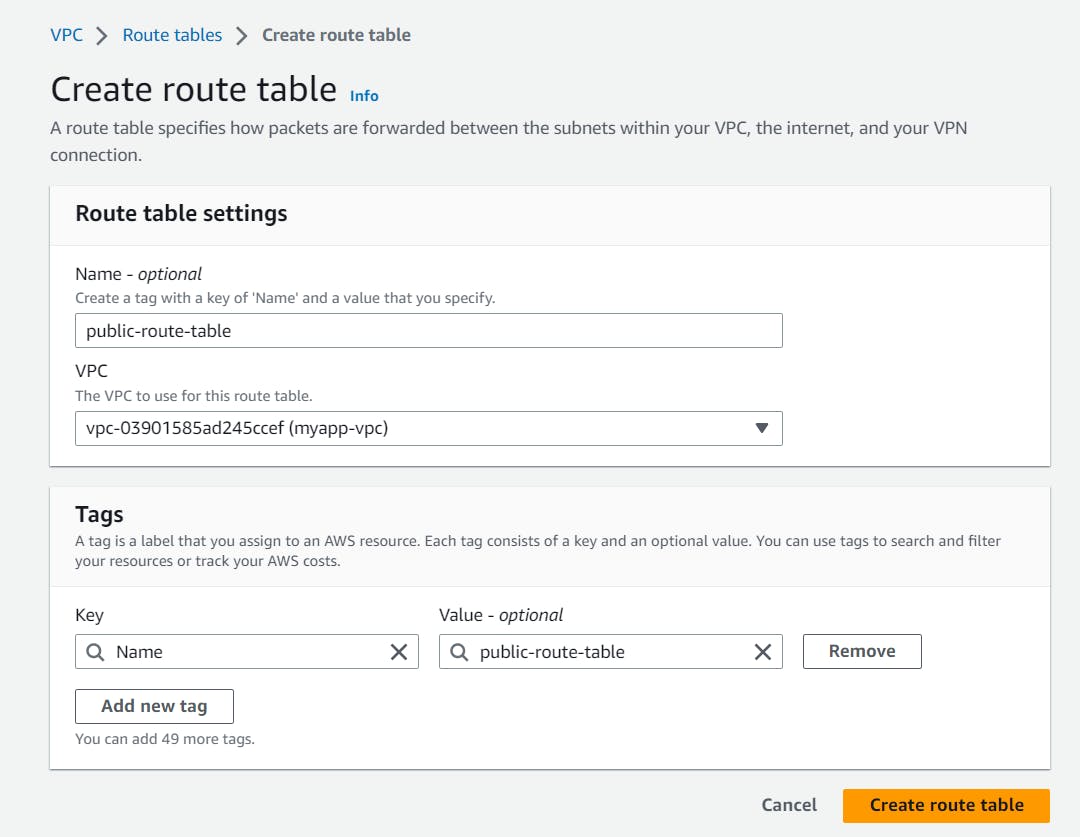
Similarly, create other two route tables and name them private route table 1 and private route table 2. (Only one public route table can serve both public subnets)

- Click on public-route-table and below search for subnet association.
Click on Edit subnet associations.
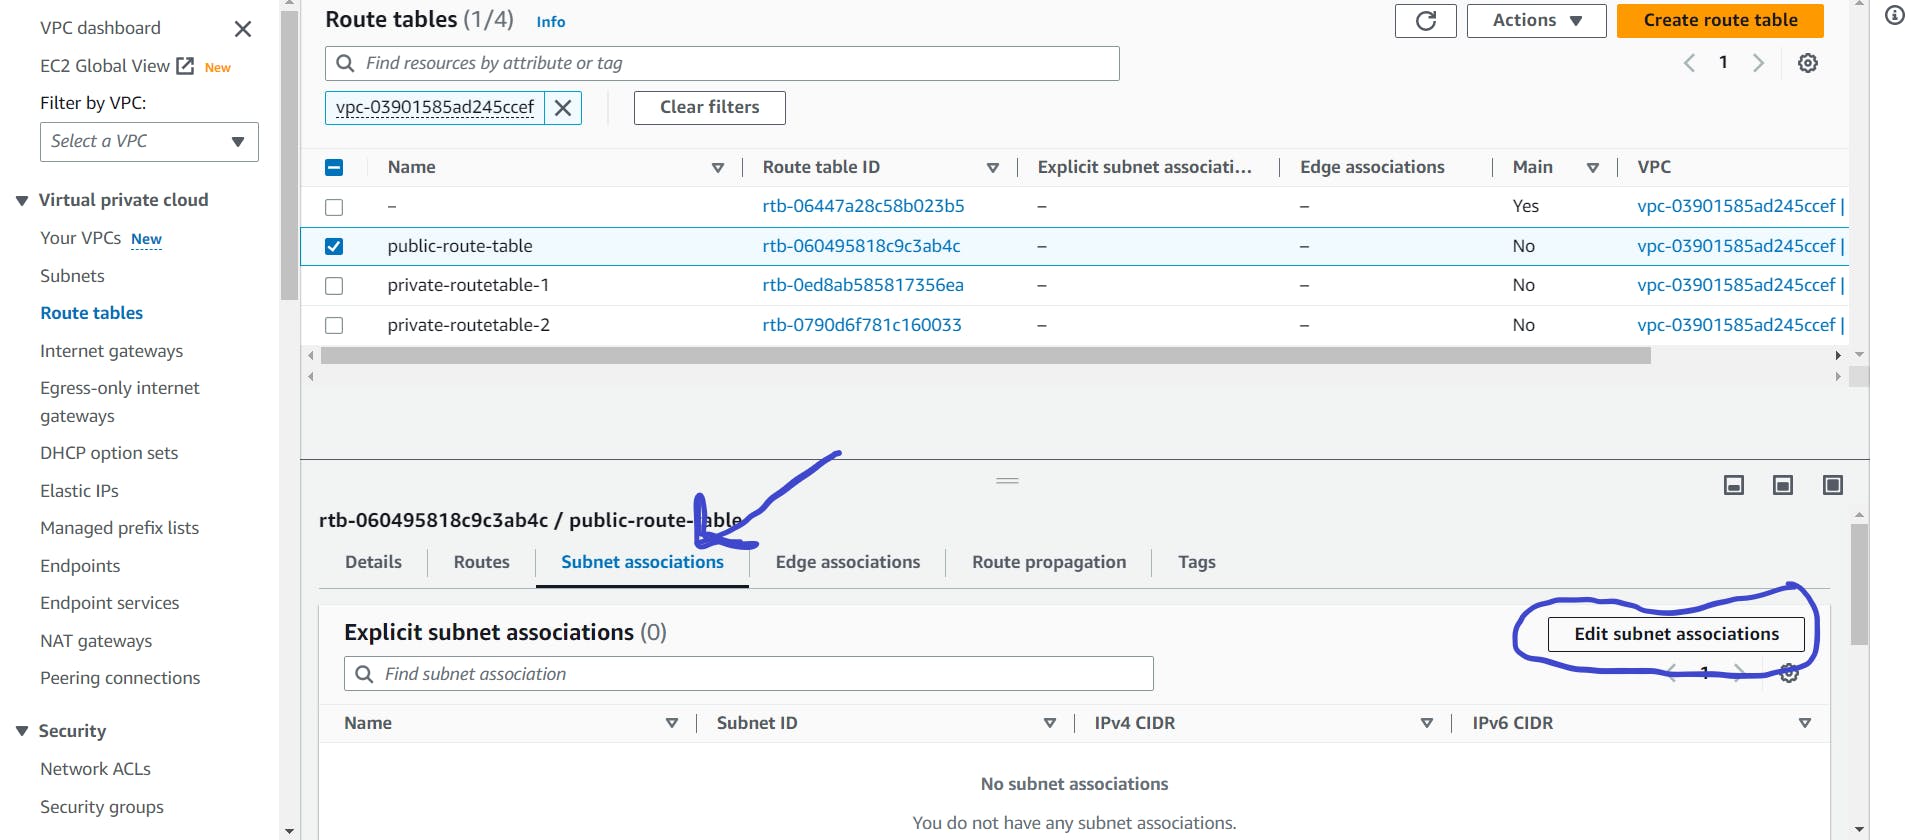
Add public subnet 1 and public subnet 2 and save.
Similarly, for the private route table 1, add private subnet 1 and private subnet database 3.
For private route table 2, add private subnet 2 and private subnet database 4.
Internet Gateways
Search for Internet Gateways in the sidebar and click on it.
Click on create internet gateway in the top right-hand corner.
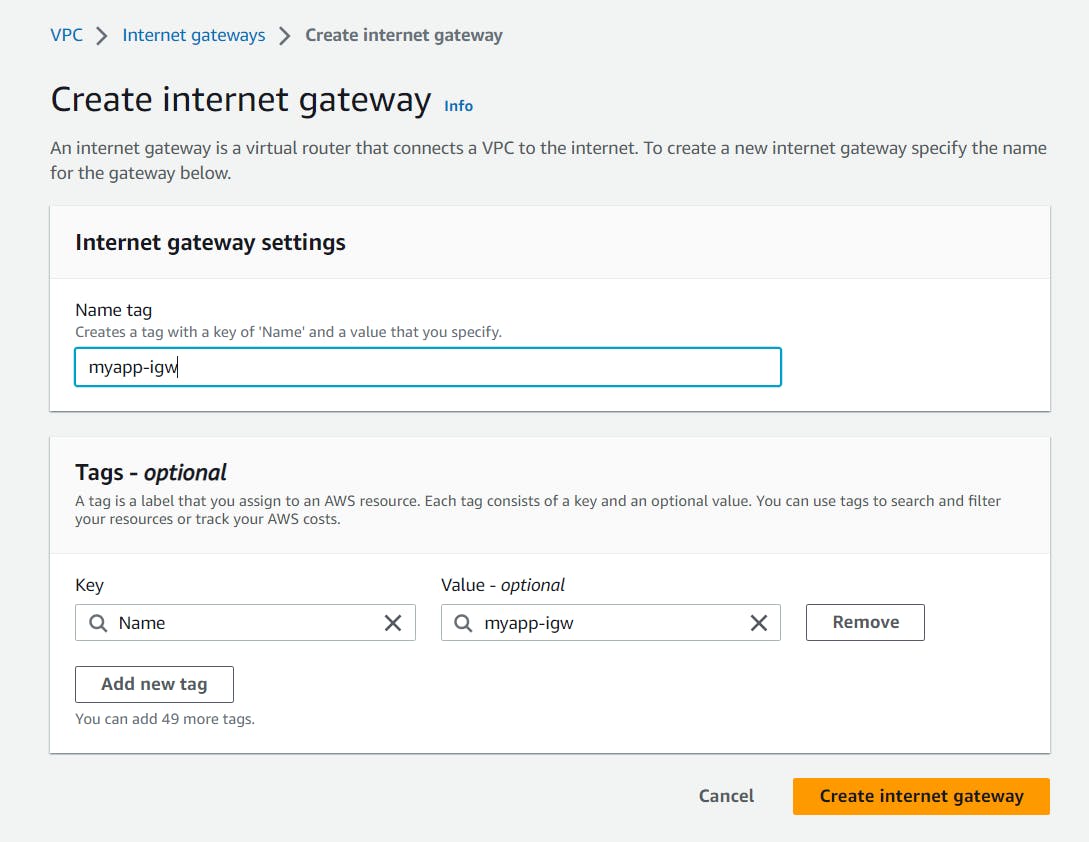
Provide your name and click on Create internet gateway.
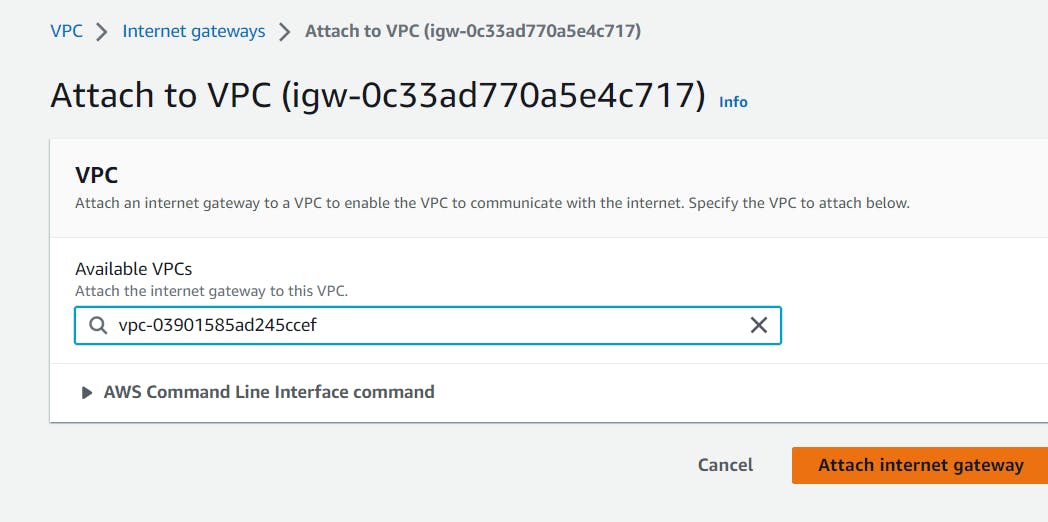
After that go back to the internet gateway page and select the created Internet Gateway.
Click on Actions and select Attach to VPC.
BACK TO ROUTE TABLES
Go to the route tables section and select public route tables.
Select Routes at the bottom and click on edit routes.
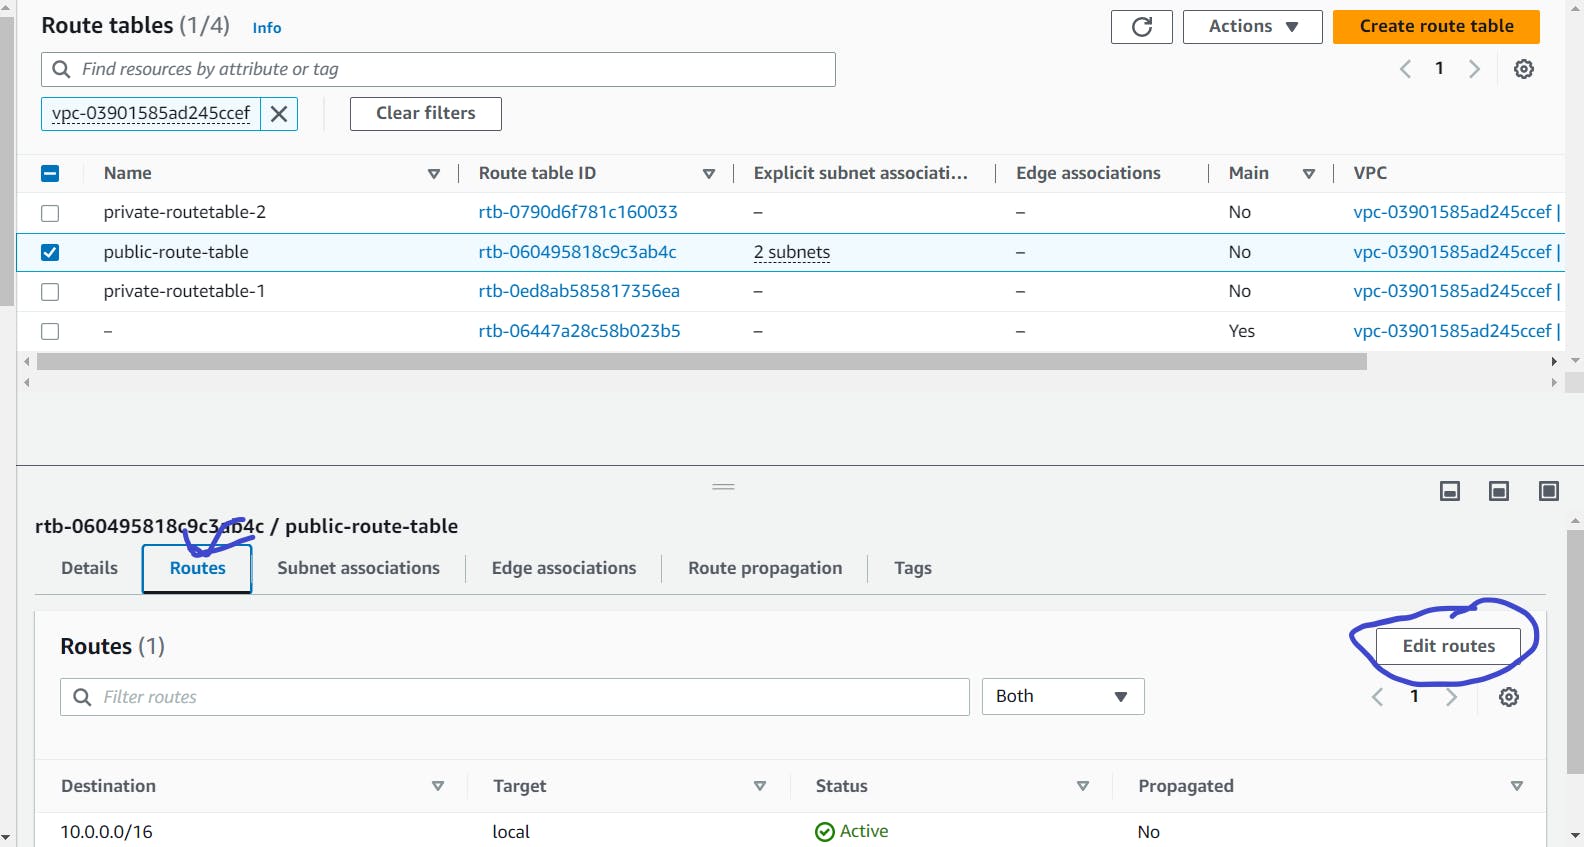
In destination add 0.0.0.0/0 and for Target, click on internet gateway and select your igw(Internet Gateway).

FOR PRIVATE SUBNETS, WE NEED TO CREATE ELASTIC IP AND ASSIGN IT TO NAT GATEWAYS. THE PRIVATE SUBNETS ARE ROUTED TO NAT GATEWAY FOR ACCESS TO THE INTERNET AND SECURITY.
ELASTIC IP
On the sidebar search for ELASTIC IP and click on it.
Click on allocate elastic IP address.
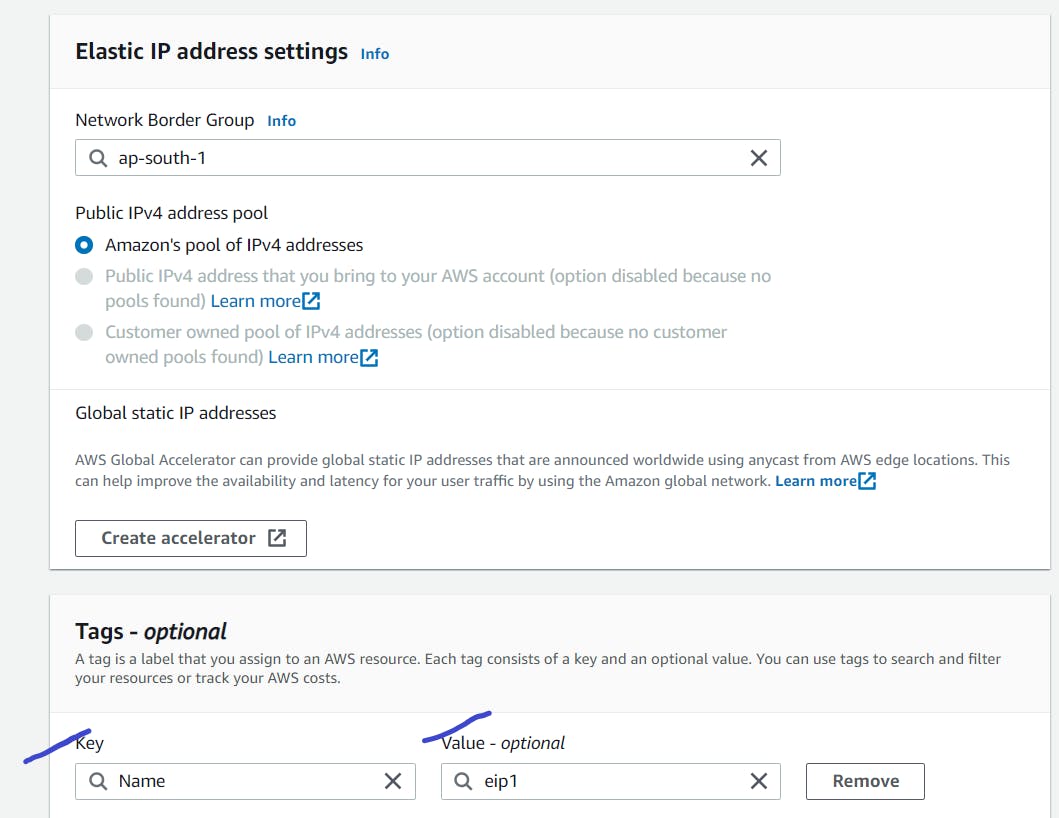
Provide name and value and click on allocate elastic ip address.

Create two elastic IP address for NAT1 and NAT2 (NAT GATEWAYS)
NAT GATEWAYS
(NETWORK ADDRESS TRANSLATOR)
On left sidebar, search for NAT Gateway and click on it.
Create two gateways, NAT1 and NAT2 and assign EIP1 and EIP2 respectively.
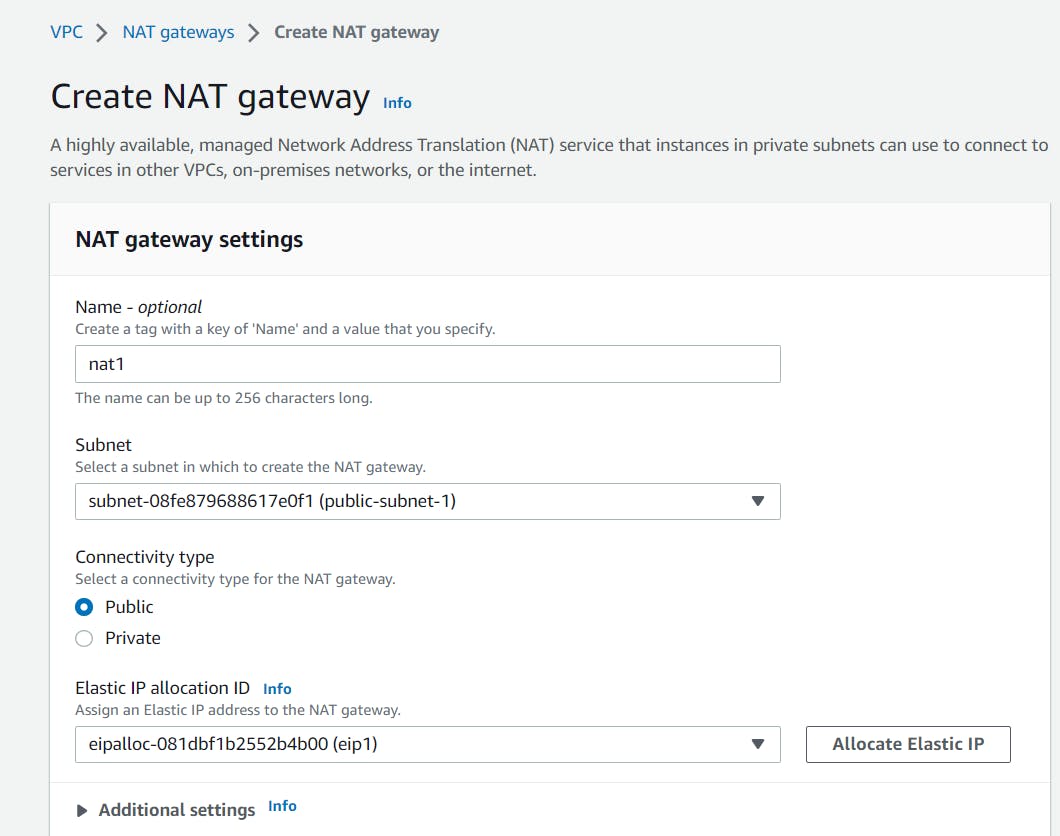
Provide public subnet 1 and eip1 for nat1.
Provide public subnet 2 and eip2 for nat2.
Wait for some time for NAT GATEWAY to become ready.
AGAIN BACK TO ROUTE TABLES
Go to route tables, and click on private subnet 1.
Click on routes and edit routes.
Add 0.0.0.0/0 and NAT1 for private subnet 1.
Add 0.0.0.0/0 and NAT2 for private subnet 2.

- Click on save changes and your 3-tier architecture is ready.
DESTROY AFTER CREATION
If you are creating just for practice then don't forget to remove all the sources created.
Delete NAT GATEWAY first and then release EIP from Actions in Elastic Ip addresses.
Delete the VPC.